Note: I’m using an airlock mod (Self-sealing Airlocks Revived) that eliminates the need for liquid locks, so replace the double airlocks with your vacuum liquid lock of choice if you need to, or just seal in the heat room entirely with tiles.
Another Note: WordPress scales down the images to fit in whatever format you’re viewing, but you can open most of the images in a new tab and see them full size.
This is a relatively simple build that anyone can put together in their base to supply cool oxygen and food cooling so it never spoils. It doesn’t require a lot of advanced knowledge about the game, although the amount of materials can seem a bit daunting. This build requires 1,400kg of steel and about 9 tons of other refined metals for the cooling section, and about 5 tons of gold amalgam + 400kg of refined gold for the SPOM (all of which could be steel if you want to go that way).
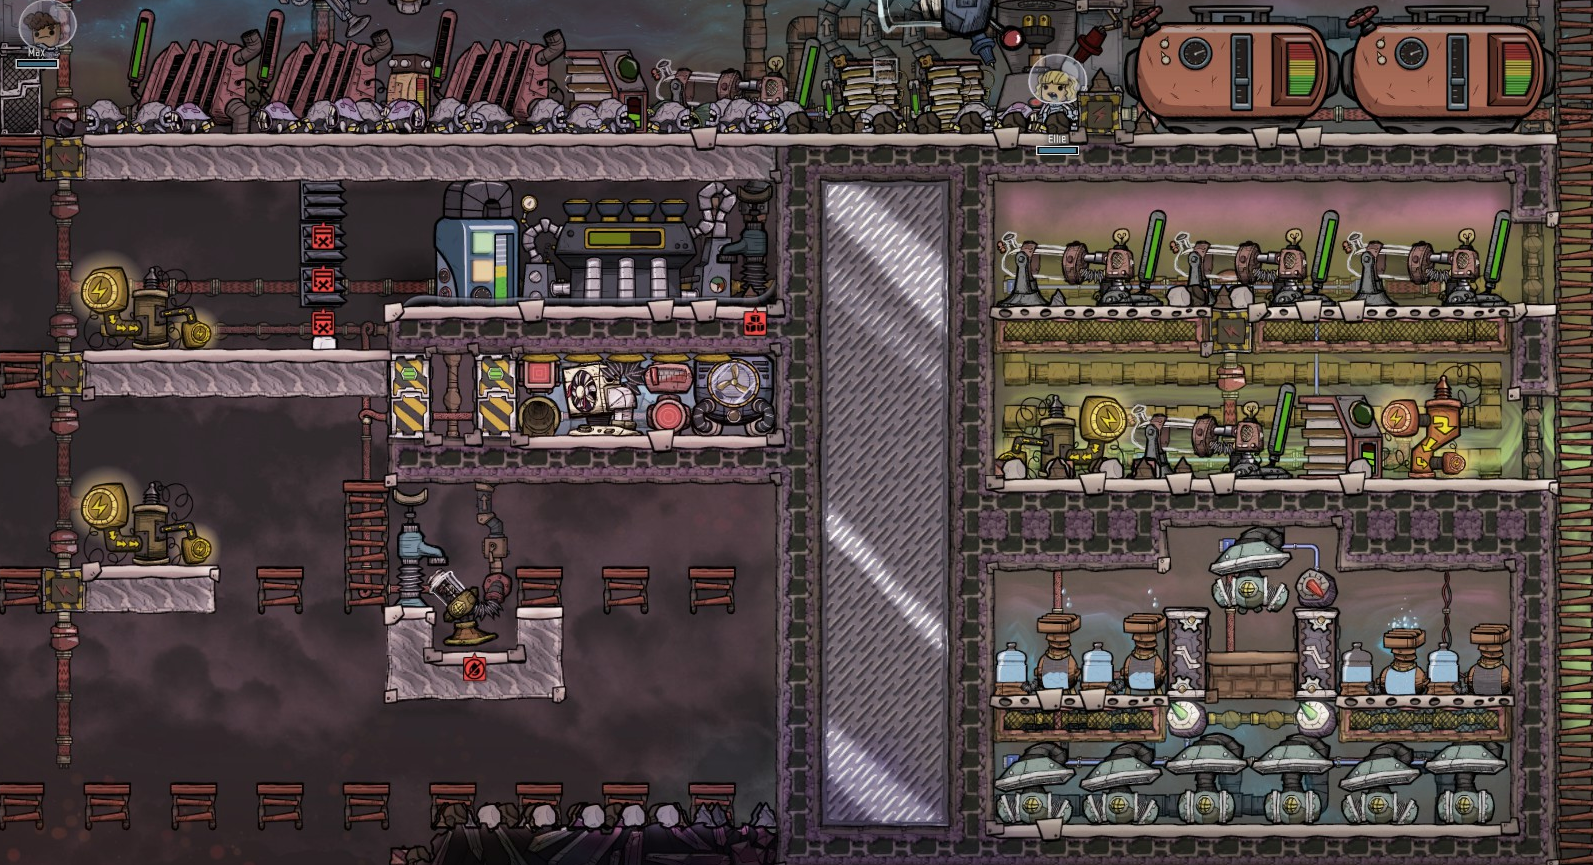
There’s nothing special about the SPOM itself, just a standard Rodriguez (based on this build), but with the additions of a compact cooling block that also provides a cooling solution for food storage. The hot room below the steam turbine includes an aquatuner that cools a metal block and a thermo regulator that cools a hydrogen loop that can be used to cool food storage (or anything else that needs cooling, although it doesn’t provide a tremendous amount of cooling for anything large).
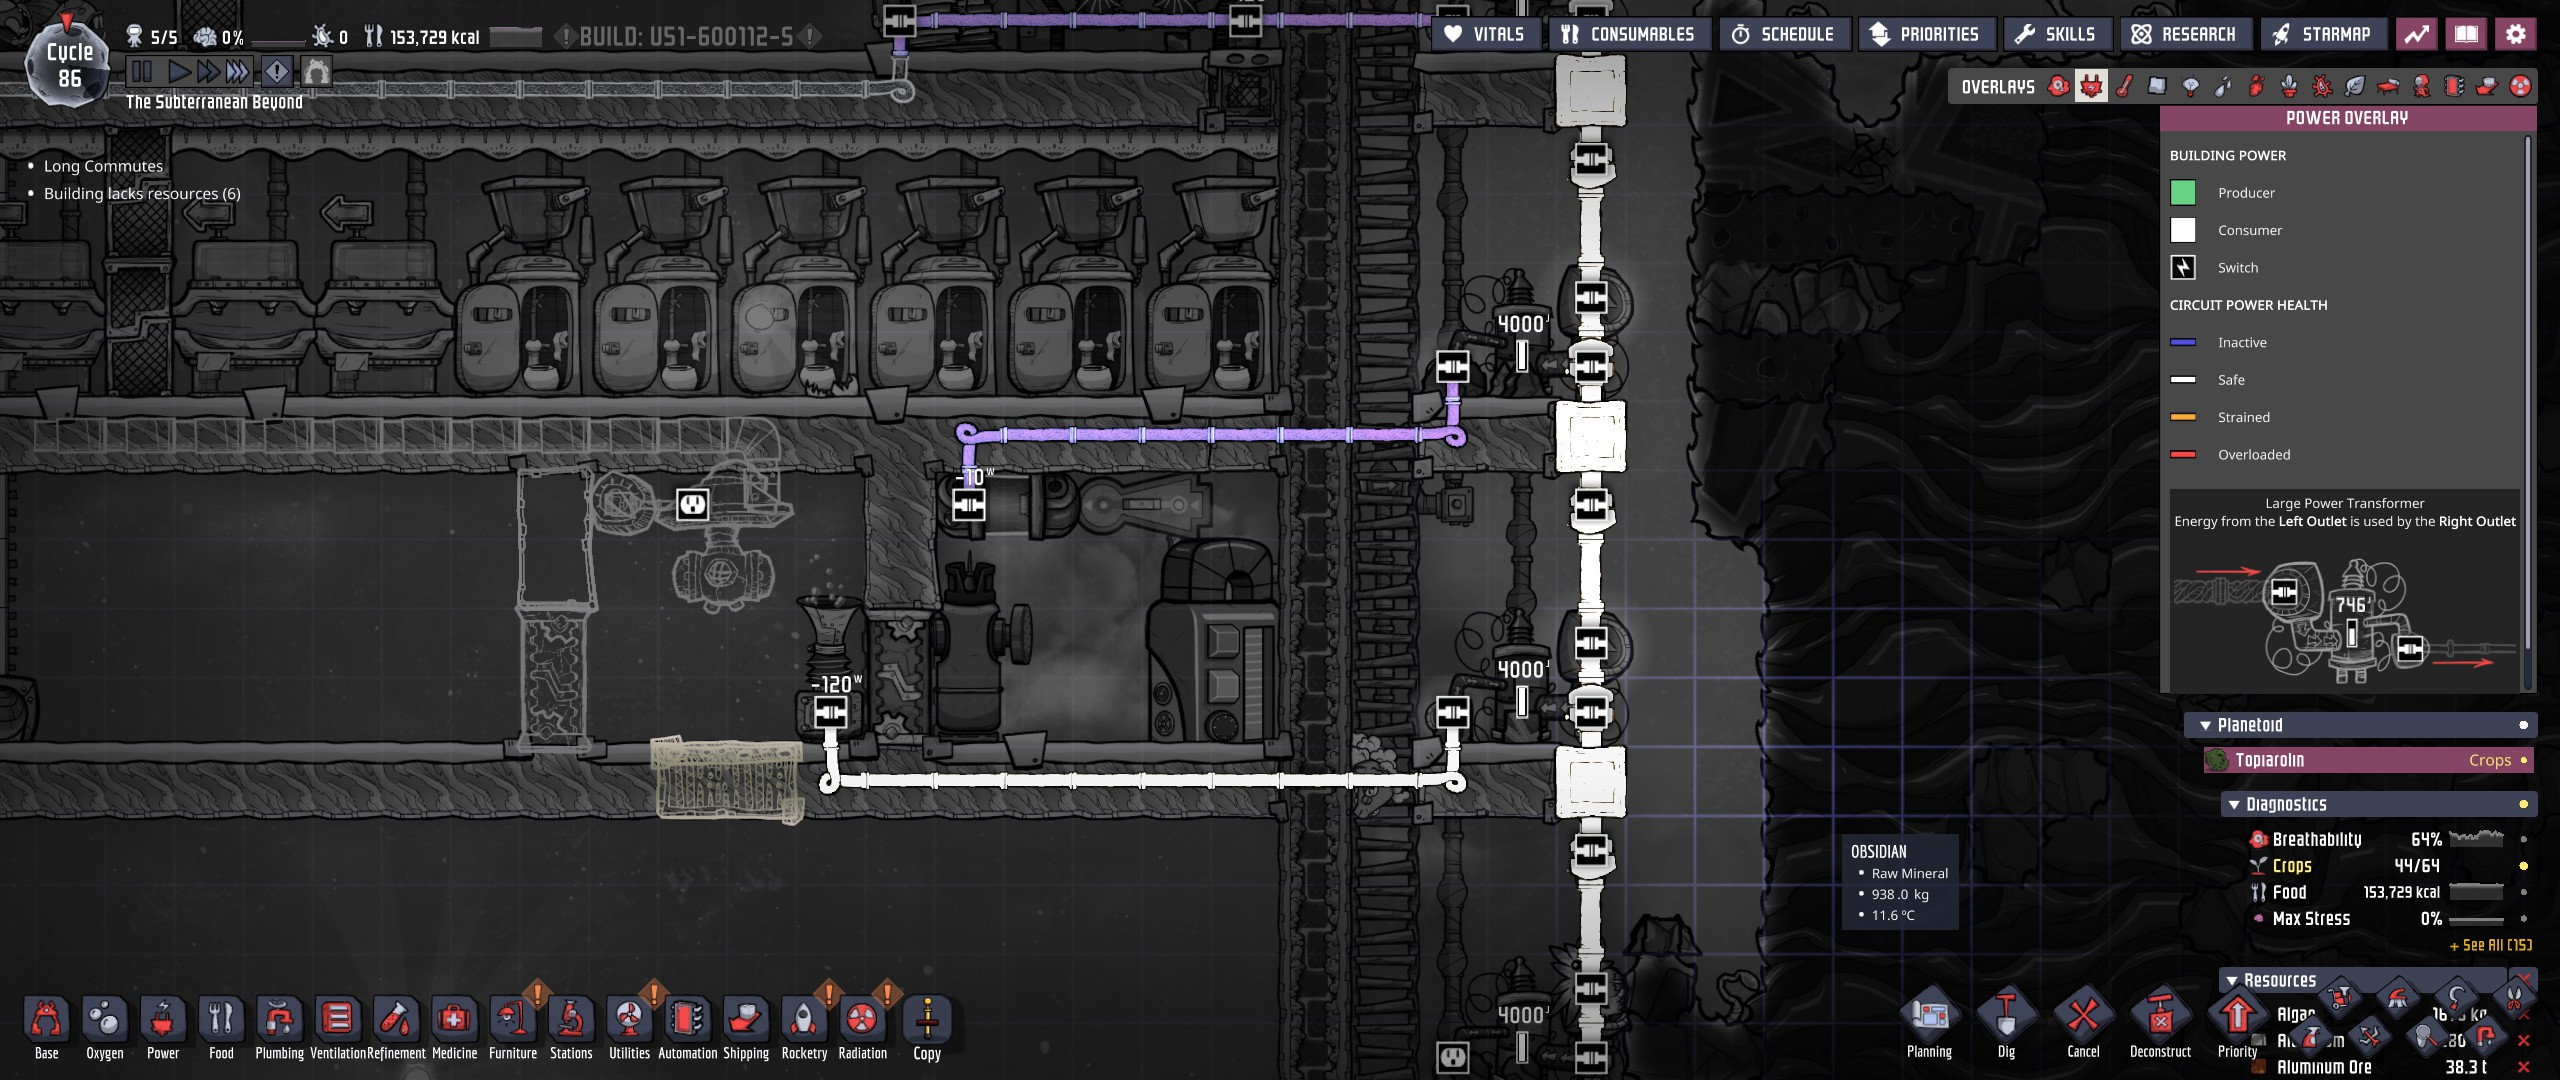
Power Overlay
A single large power transformer powers the entire cooling section. Unless your base is consuming a lot of oxygen, the excess SPOM hydrogen probably doesn’t provide enough power to run the aquatuner, although in my case with 8 dupes the aquatuner is only running at 13% duty cycle, with the overflow hydrogen generator running at 28%. The thermo regulator is running at 34% uptime, so let’s run some numbers:
- Hydrogen generator: 800W @ 28% = 224W average
- Aquatuner: 1200W @ 13% = 156W average
- Regulator: 240W @ 34% = 82W average
- Net power: -14W
This of course doesn’t include the power generated by the steam turbine either. This is harder to calculate since the power produced depends on the temperature of the steam, and it doesn’t run very often, so maybe worth 50 to 100W of extra power. This does make it power positive when included with the SPOM overflow, but I wouldn’t depend on it, especially with battery leakage given the long cycle times.
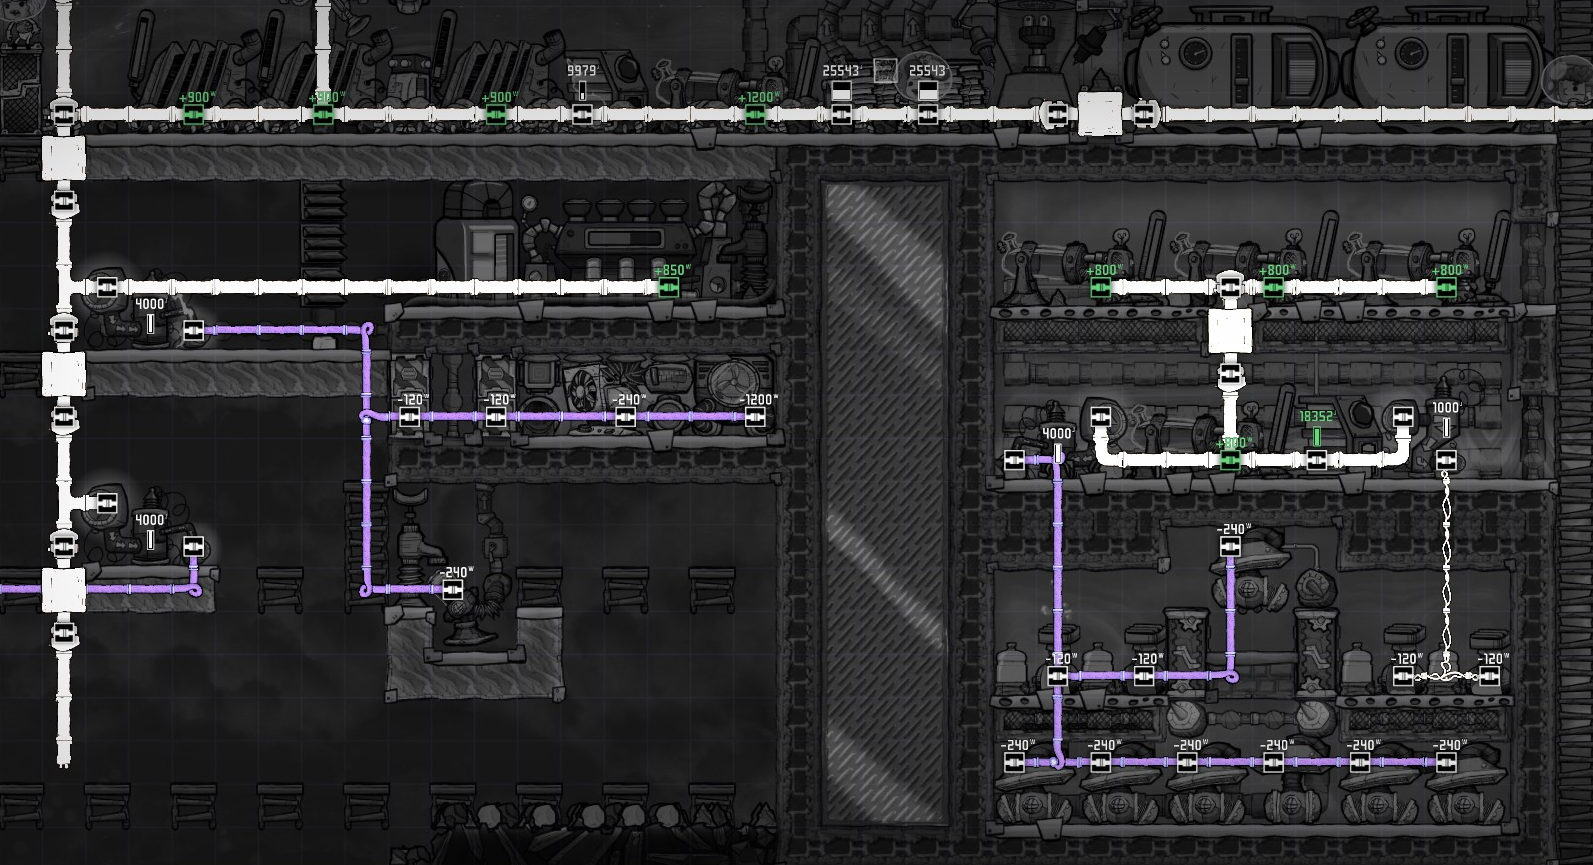
Plumbing Overlay
The pump at the bottom was just used to prime the system, and can be removed after the storage tank is sufficiently full. I’ve got about 2200kg of polluted water in the tank, plus whatever’s in the pipes, which provides some very stable temperature. The aquatuner is set to turn on above 0C, and since almost all of the loop passes through the tank before returning to the aquatuner, the temperature of the stored water and the cooling block is almost always within +/- 3C.
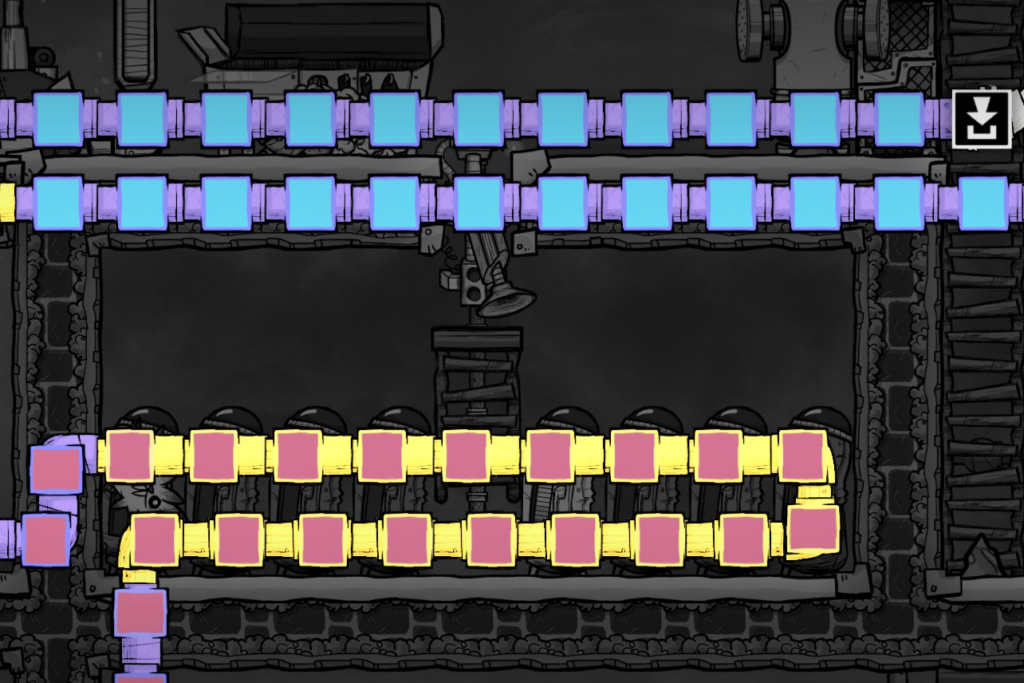
The cooling block is lead radiant pipes running through lead tiles. If you have better conducting metals available those will work even better, but this works well enough. The block is 3 tiles wide to have room for the 3 SPOM output pipes, which run bottom to top (as will be seen in the ventilation overlay).
Additional radiant pipes cool the steam turbine and power transformer. The turbine is also sitting in a thin layer of crude oil to help with heat conduction and stability. It probably isn’t entirely necessary to cool the transformer if you have it in a large enough room of stable temperature, but I made everything out of lead, so with the lower overheat temperature I’m playing it safe.
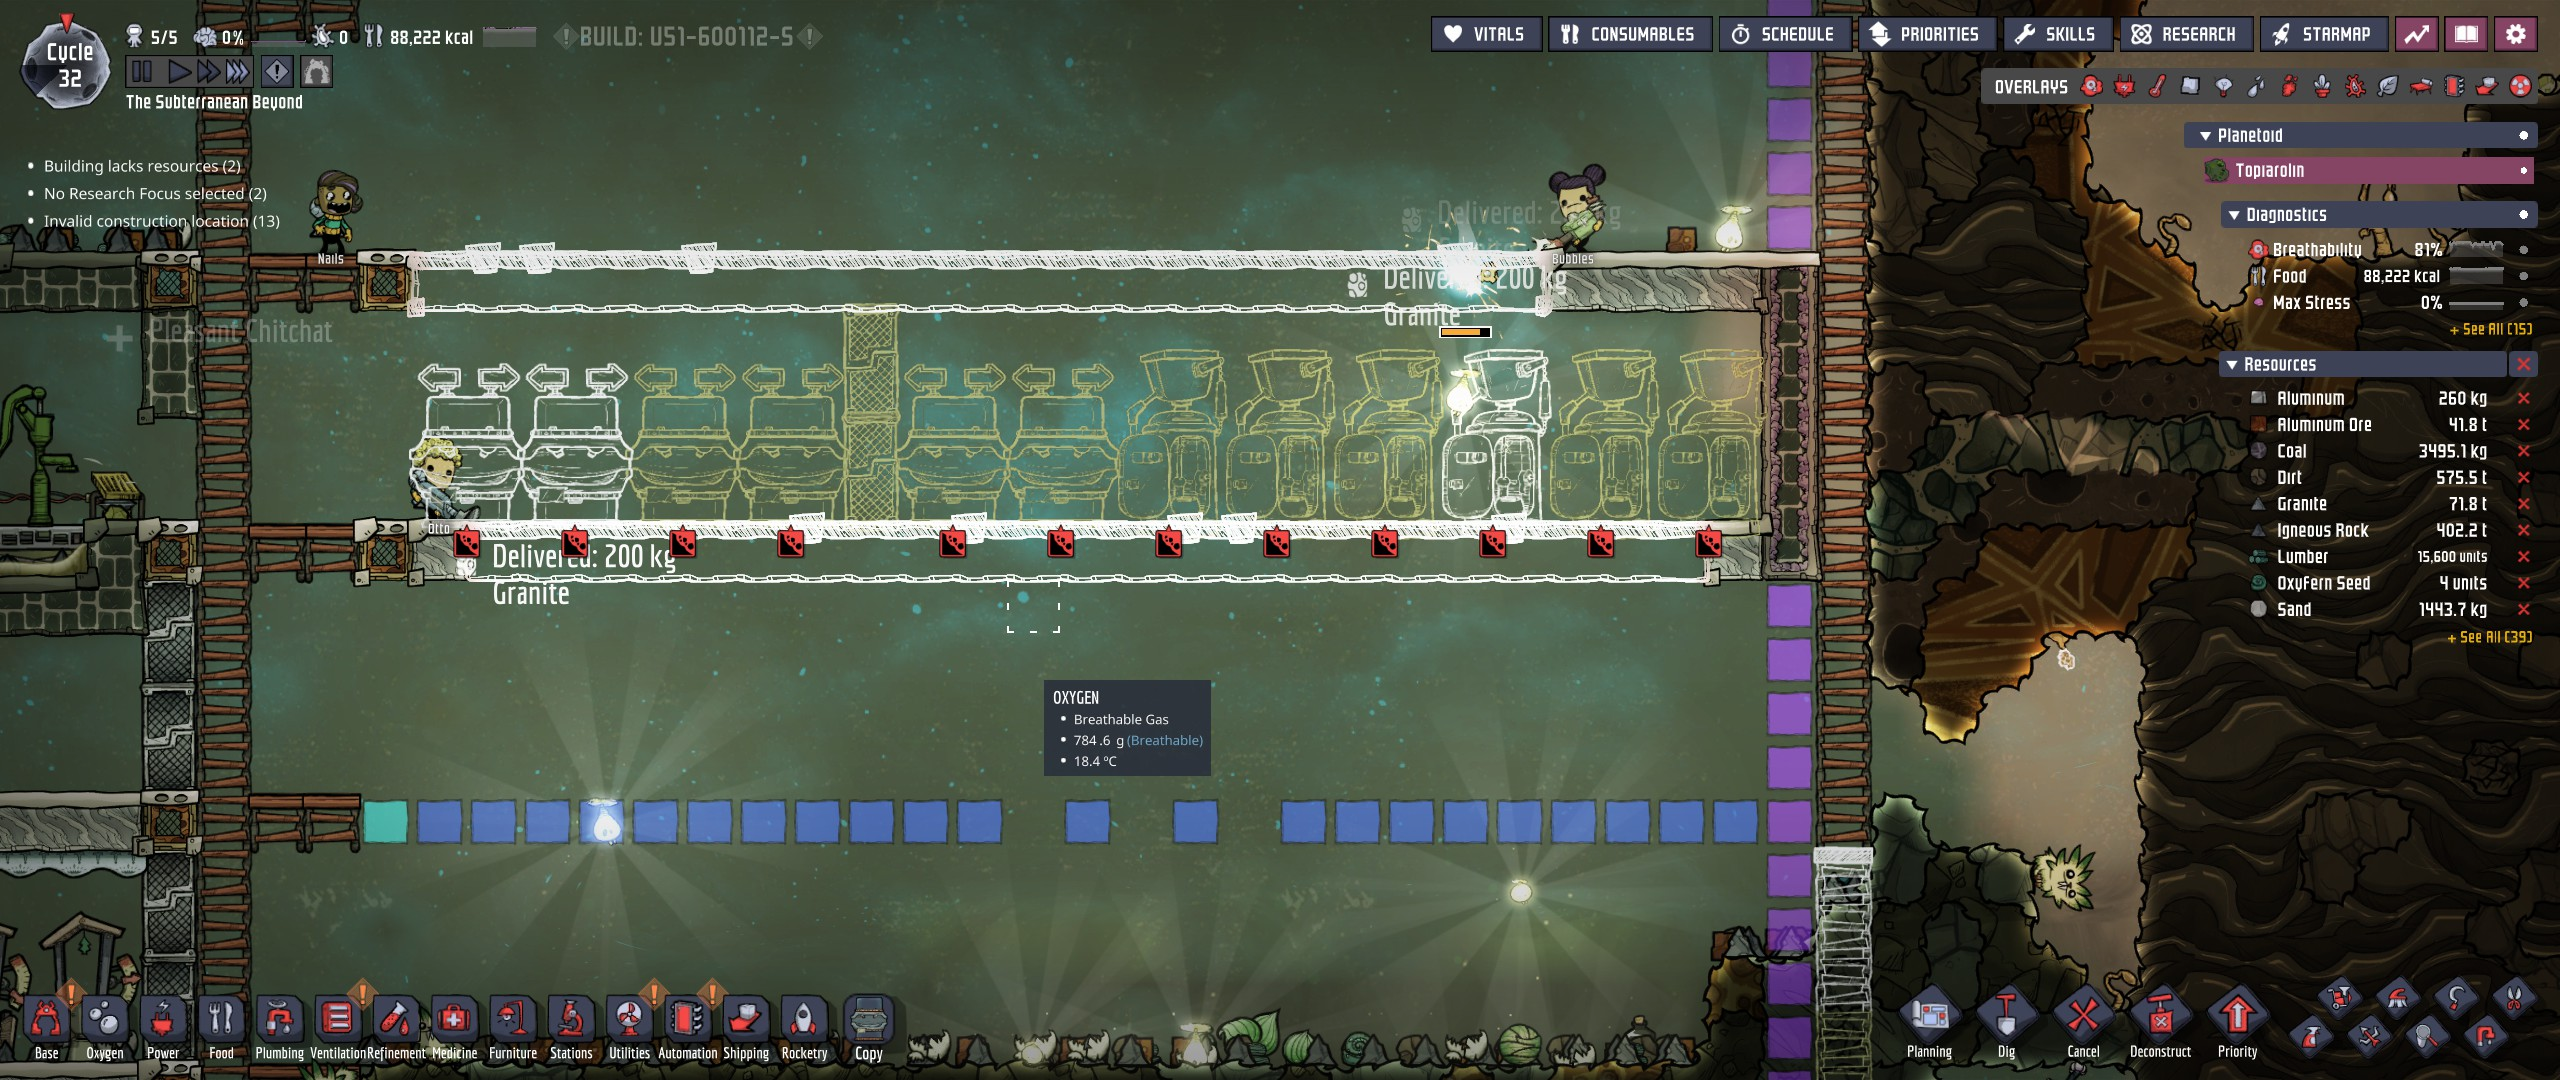
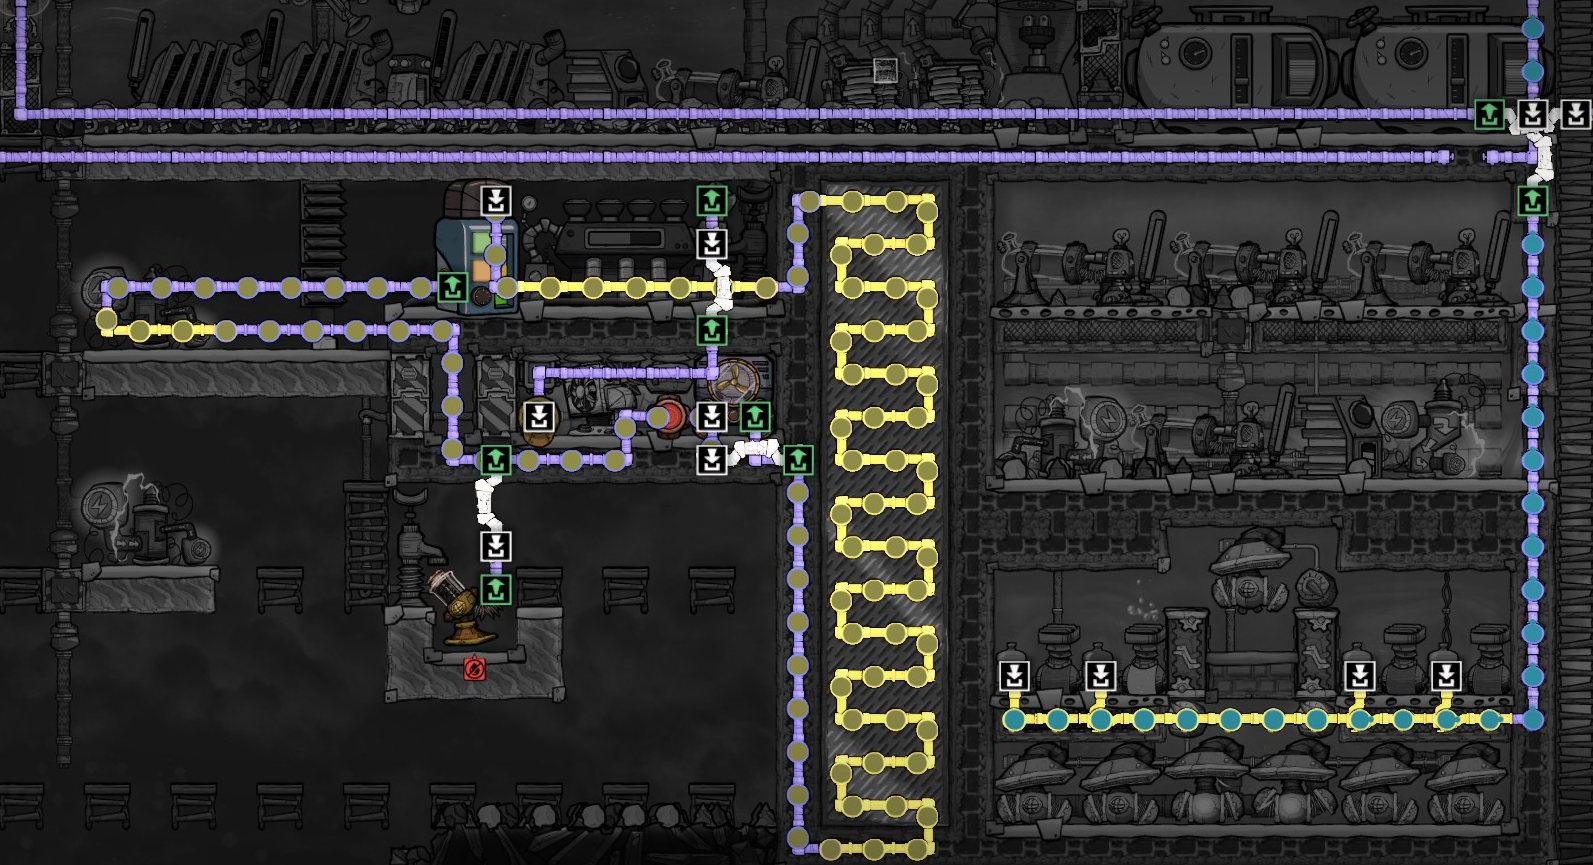
Ventilation Overlay
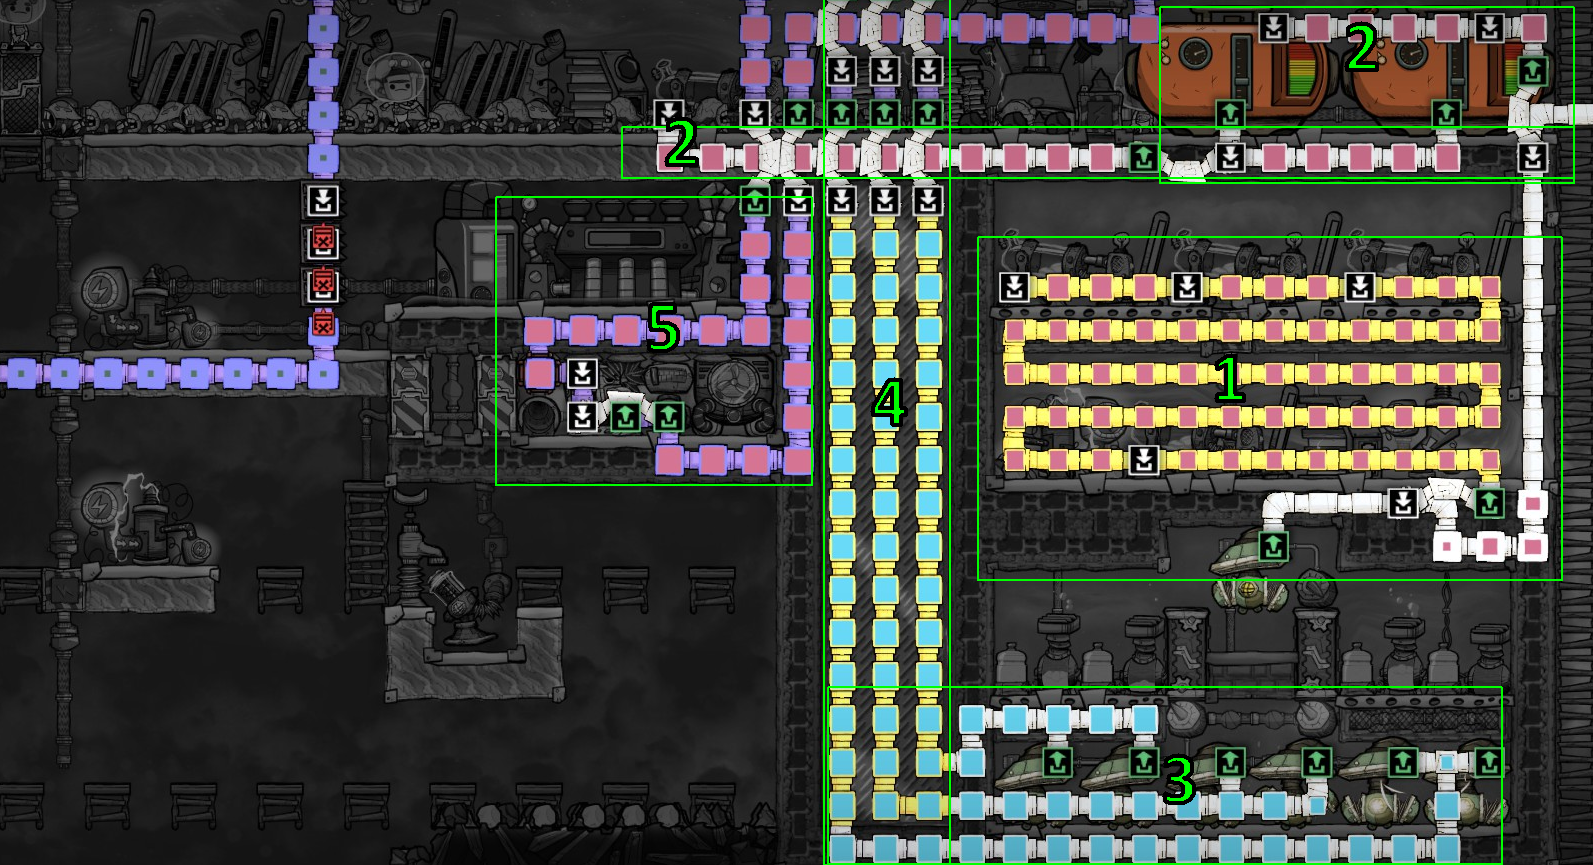
There’s a lot going on here so let’s break it down piece by piece.
1 – Hydrogen in SPOM: Nothing new here, hydrogen goes to the generators inside the SPOM before overflowing to section #2.
2 – Hydrogen Overflow: This consists of two parts, one of which is offscreen to the right. First, hydrogen goes into some tanks that feed a generator that’s part of my main grid and controlled by smart battery. Anything that overflows from that goes to some extra generators that are always on (but still connected to the main grid). So the SPOM never backs up. This doesn’t need to be located here, it was just convenient with my current base design.
3 – SPOM Oxygen Output: Standard Rodriguez-style SPOM output. These pipes run directly into…
4 – Cooling Block: Radiant gas pipes cool the SPOM oxygen output, exiting at about 0-3C. These pipes run up into the base, atmo suit docks, etc.
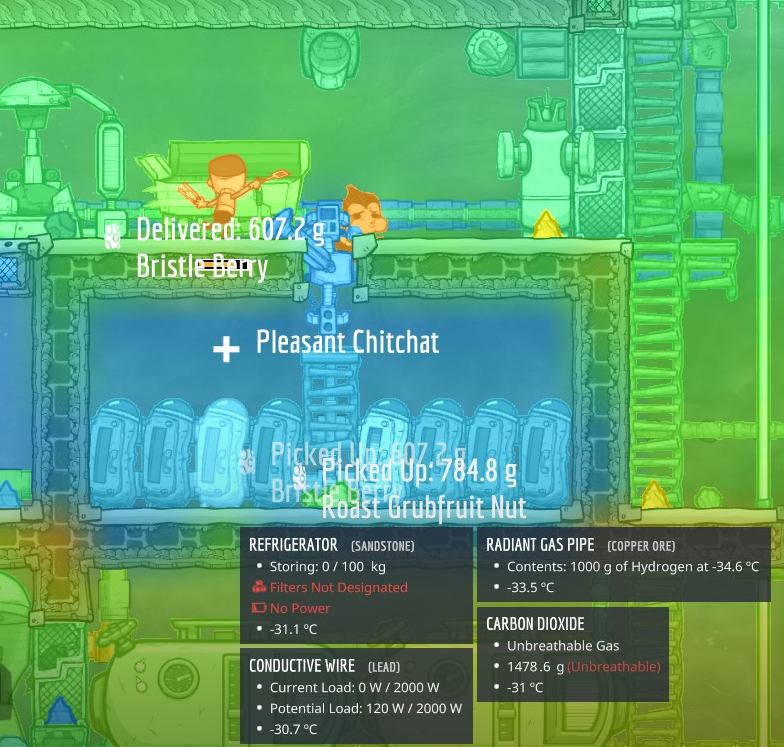
5 – Food Storage Cooling Loop: This is just a hydrogen cooling loop that runs through the thermo regulator, controlled via pipe sensor to run when above -36C. This runs up to the food storage pit which is just a bunch of unpowered fridges sitting in CO2.
The insulated tiles keep the pit at about -28 to -32C, a good enough safety margin to keep the food deep frozen. A little bit of cooling leaks out through the gap, but the regulator is able to keep up with it. An auto-sweeper handles delivery of the food to the grill (and later a gas range can be added in the top right) so dupes only enter the pit to retrieve cooked foods.
This is further automated by a conveyor chute dropping off output from farms directly into the pit, so even if the fridges are full the raw ingredients still get cooled. Later in the game, when the fridges start to fill up, I set the fridges to only hold cooked foods, while the raw food just sits on the floor.
Power wires are still included behind each fridge, but disconnected, so they can be quickly hooked up in the event of cooling loss. You could also automate this with a thermo sensor and power shutoff, or even just a thermo sensor connected to an automated notifier if you want to manually handle the connection.
Automation Overlay
This is mostly covered in the other sections but included for completeness.
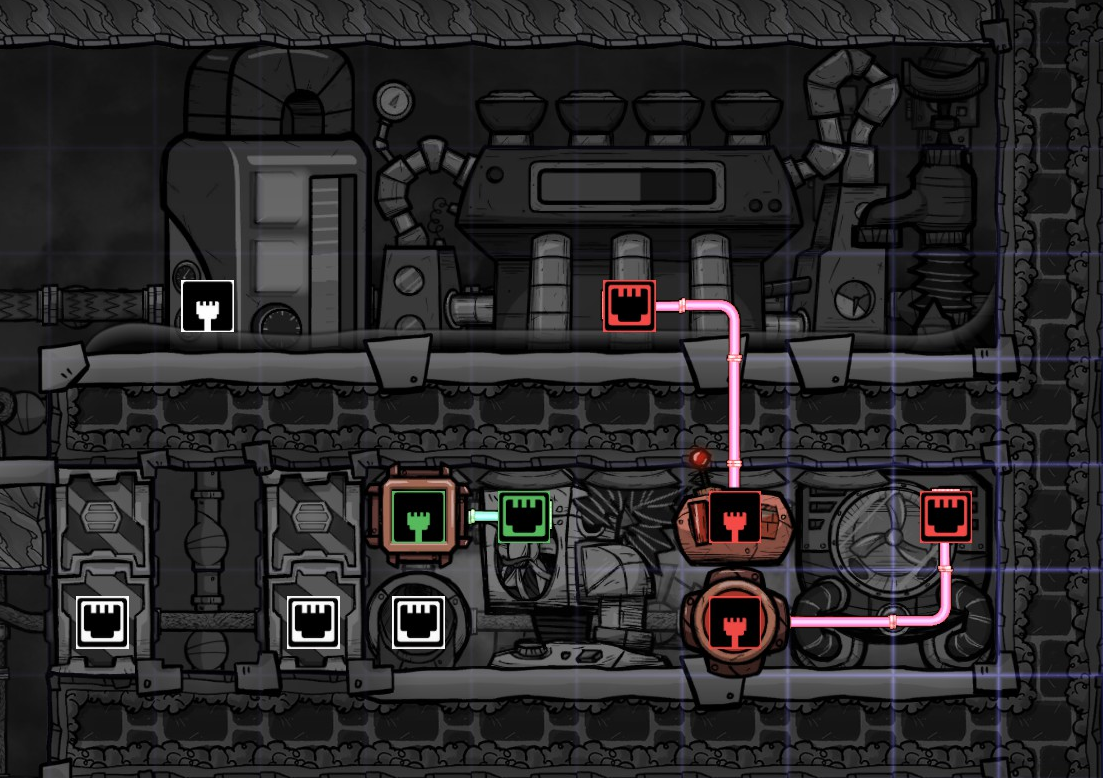
- Gas Pipe Thermo Sensor: Above -36C
- Liquid Pipe Thermo Sensor: Above 0C
- Thermo Sensor: Above 195C
No complicated logic, just simple single-condition triggers for everything. You can probably take the gas sensor down to about -42 before you start running into problems with CO2 in the pit liquefying.
Variations
You can arrange the components of the build in almost any way that fits your base, but bear in mind the materials you have available for building. Insulated gas pipes made of sandstone or even igneous rock will still leak a little bit of heat, so a longer food cooling loop may not be as effective or require a lower setting on the gas pipe thermo sensor.
The SPOM can be split into two halves and put side-by-side, with the upper power section next to the lower electrolyzer section. The hydrogen overflow can be put just about anywhere to meet the needs of your power grid.
The cooling block and hot room should be close to each other but don’t necessarily need to be close to the SPOM, as long as you can run the SPOM output pipes through the cooling block. You could also make the cooling block wide instead of tall, or even snake the gas pipes through a larger cooling block, although this build does have relatively high thermal stability so a larger block doesn’t really get you anything extra.
The food cooling loop might not work with a chlorine-based infinite storage due to the higher condensation temperature. I haven’t tested it; the open CO2 pit works well enough for my needs.
Programming Note: I’m still working towards the petroleum boiler build on this map. It’s still taking a lot longer than I expected because the map has a lot of hot rocks to work around. I haven’t even reached the normal oil biome yet.